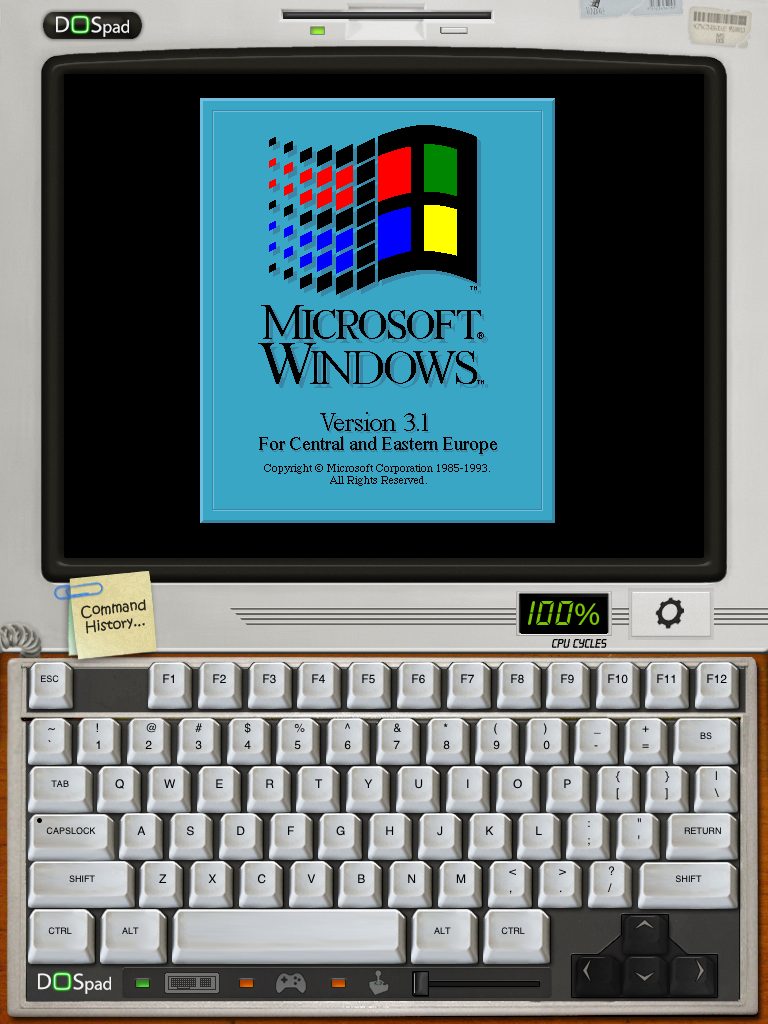
How To: Windows 3.1 On The iPad Using DOSPad – Installation, Mouse, Drivers, Sound
![]()

What We Need

First of all, we of course need an jailbroken iPad. As of version 3.2.2, you may use limera1n or greenpois0n to do so. Then, we need DOSPad, which is available for free in the Cydia Store. You just need to add http://www.litchie.net/cydia as a new repository and find DOSPad using the search function. You will be offered two different versions, a stable and a beta one. Choose the beta, since in our tests the “stable” could not be installed due to a “size mismatch” error. Finally, we do need Windows 3.1 itself. If you’re in business for a long time, you’ll have it in your shelf, otherwise you’ll find licenses for little money on ebay. To enjoy more than 16 colors in Windows, we additionally need the graphics driver (.zip, 557kB) for S3’s 864 chip, the one DOSBox emulates.
Windows 3.1 ships on 7 disks. Copy each disk’s content into one folder (we will call it “win31” in our walkthrough). Finished, you should have like 500 files in that directory.
We’ve got to copy this folder to the iPad now. If you installed openssh, you may use a SFTP-client (root password is alpine, if you did not change it) or you copy it on the iPad using webspace. While you’re on it, it’s a good idea to copy the S3-driver as well.
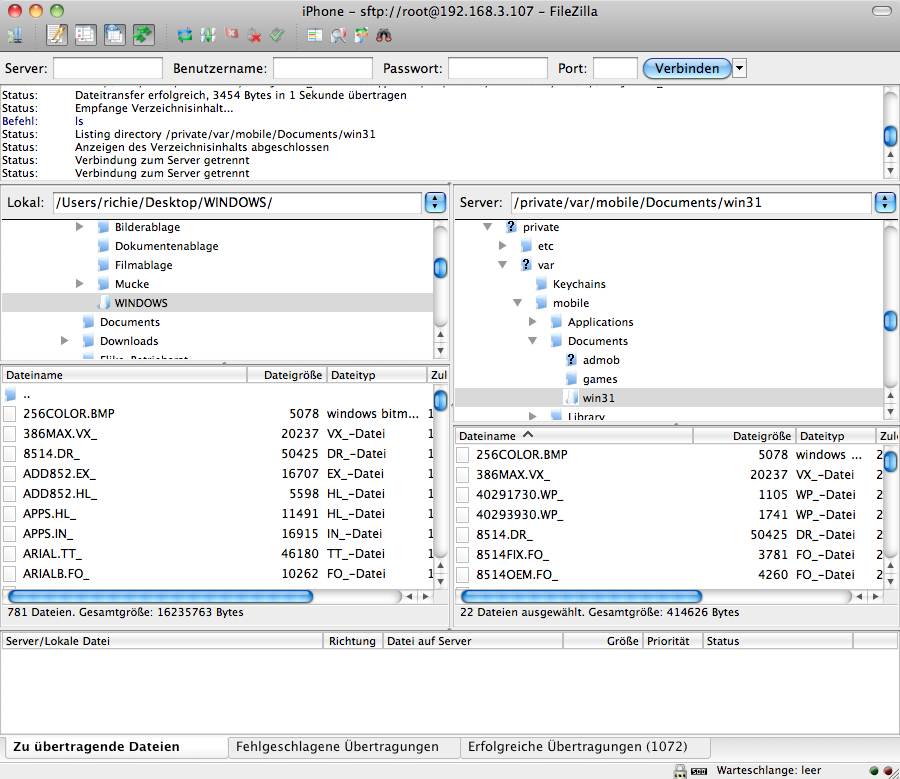
For SFTP the target folder is:
/private/var/mobile/Documents
This is the folder that’s mounted as C:\ later in DOSPad.
If you don’t want to use SFTP for any reason, you may use a service like Dropbox. Upload the windows installation files zipped into a single archive together with the containing folder. On your iPad, “copy” (i.e. download) and unzip them again:
copy www.yourserver.com/win31.zip

unzip win31.zip
Please make sure to include the folder in the archive (for example /win31, containing the installation files), otherwise you’re likely to have a mess of 500 files in your root folder after unpacking.
No matter how you copied the files to your iPad, now we do have to continue there. After having started DOSPad on your iPad, you’ll be greeted by the blinking cursor at the DOS prompt.
Windows Installation
In this guide, our installation folder is called “win31”. There, we find a setup.exe. Let’s start:
C:\>cd win31
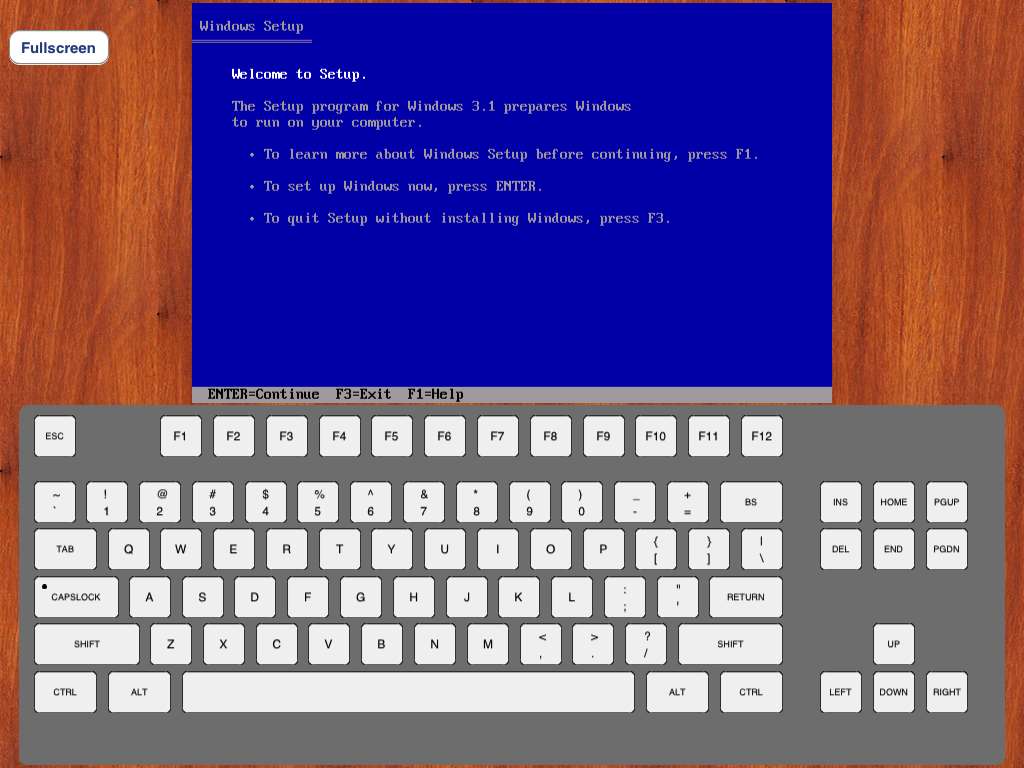
C:\WIN31>setup
The Setup-Bluescreen welcomes you.
Windows-Setup needs to alter the configuration files config.sys and autoexec.bat. As we want some control on that, we should choose custom setup. We agree with the hardware configuration and wait for the kernel files to be copied.

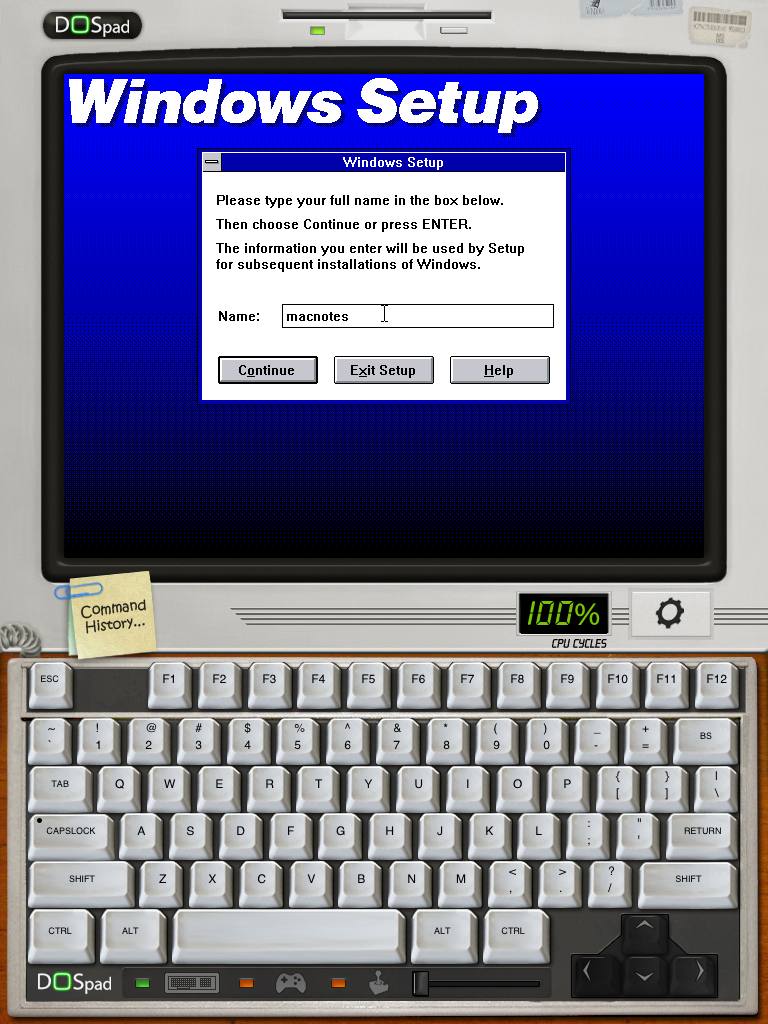
Back in the graphical mode, we have to enter our name. The following dialogue askes us to choose what to install after the basic system files. We do not choose anything at all, having no printer attached and no need for searching for applications. The choise of components is in most cases okay (default = install everything) and virtual memory is just fine.
After that, we see another copy process. After its completion, the Windows Program Manager gets filled with Windows programs. Now we arrive at the point why we did choose custom setup: Changing configuration files. We’re not going to to this by ourselves now, neither do we want the installer to do so. So we choose the third option to do this later on our own. Now the Installer asks us to save the changed files under autoexec.win and config.win right in the Windows directory, we do agree on this one. We do not need to watch any windows tutorial, being hard boiled nerds rather then bloody beginners, and that’s how we reach the end of the installation.
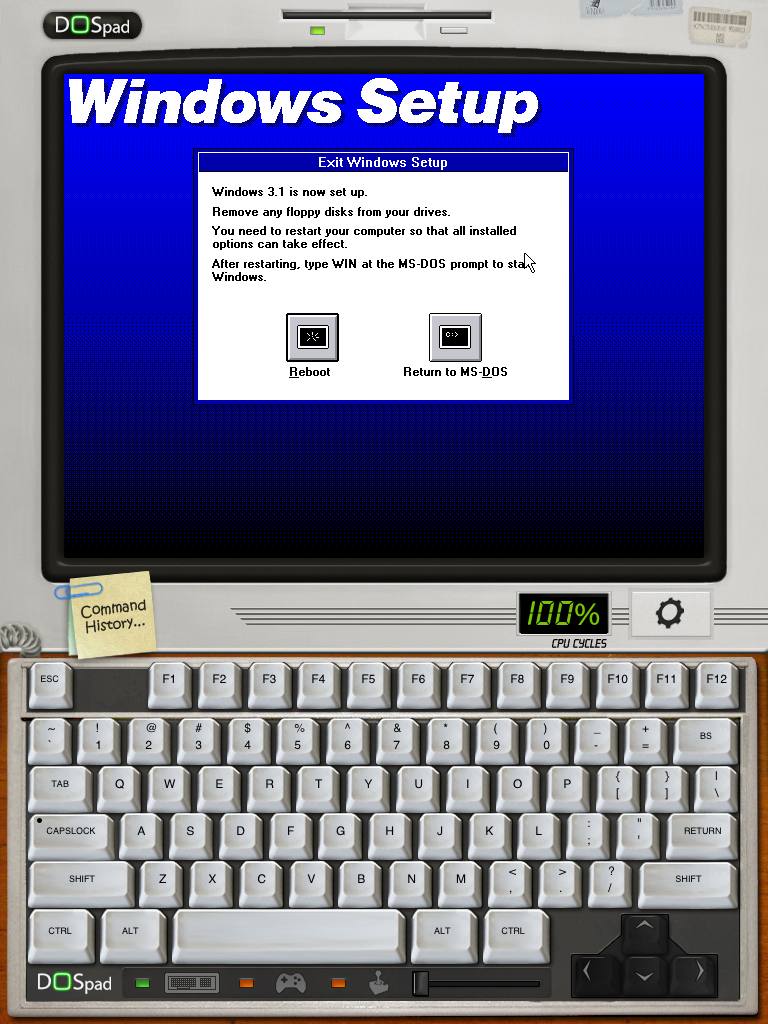
Now you should restart DOSPad (press home button and restart it), otherwise the mouse would not work after starting Windows. (Sidenote: restarting DOSPad is always a good idea in case of trouble. Only if the error still occurs, you should start searching other solutions to the problem.)
First Windows Start And Driver Installation
Since we didn’t want to change the startup files (more on that later), Windows is not defined in our “Path”-Variable and therefore typing “win” would throw an “illegal command”-error. That’s why we have to change the directory to the Windows-folder:
C:\>cd windows

C:\WINDOWS>win
Now Windows 3.1 should start up and the mouse should work.

The fun begins after installing drivers as right now we have only 16 colors and a mute Windows. Installing the sound driver is a little easier than graphics, so we start there.

Go to Main, Control Panel, Drivers. Add a new one, “Creative Labs Sound Blaster 1.5”. Windows asks you for some driver disk, click “Choose…” and navigate to our installation directory, C:\WIN31. Now choose port address 220 and interrupt 7. Ignore the dialogue telling you Creative’s drivers are better and restart Windows instead. You should hear the first Windows system sound now from your iPad’s speakers.

Note: Sound Blaster’s IRQ 7 and port address 220 is always the way to go inside DOSPad. These settings also allow games like DOOM to produce proper sound.
Now we want to install the graphics driver to be able to enjoy up to 65536 colors. (Please note that DOSBox for Windows, Mac and Linux is able to run in higher resolutions while DOSPad is not. On your iPad you have to stick with 640×480.)
In order to do that, quit Windows (double click the grey box top left in Program-Manager). We’re now in a folder like C:\WINDOWS\SYSTEM, but we want to dump the drivers in a new folder in our root directory. So we have to change directory to the root, create folder, download driver and unzip (You may skip this if you already copied this using SFTP to /private/var/mobile/Documents):
C:\WINDOWS\SYSTEM>cd ...

C:\>md s3

C:\>cd s3

C:\S3>copy http://www.macnotes.de/images/s3.zip

C:\S3>unzip s3.zip
Now go back to your Windows directory and start the installer:
C:\S3>cd ..

C:\>cd windows

C:\WINDOWS>setup
Get to “Display” and press RETURN. Scroll down to the end which states “Other”. The installer wants the drivers disk, point it to C:\S3. From the list we can choose one of the first three possibilities – up to “64k” colors are possible, but DOSPad emulates an Intel processor and therefore we gain poor performance – so you should choose not more than 256 colors to experience some fair performance. If setup asks you for the “S3 Flat Model Driver Disk”, again point it to C:\s3. After this is completed, you may restart Windows. A light blue window head indicated that you’re running more than 16 colors. This will finish the driver installation.
Edit System Configuration Files
Why that? DOSPad uses its own files that are used to load commands on startup. These are on drive Z while Windows searches for them on drive C. It’s unable to find them and therefore thinks it can set the “PATH”-Variables just the way it wants. Unfortunately, this will replace the PATH-variable which makes DOSPad’s utilities such as mem unavailable. That’s why we now have to edit those files on our own. Start Notepad, click File, Open… and choose “All Files” as Filetype. Get to C:\WINDOWS and open autoexec.win, the file Windows setup saved here. Here we find a line starting with “PATH”:
PATH C:\WINDOWS;
Let’s extend this to where DOSPad saves its utilities, Z:\. Afterwards, this line should look similar to this:
PATH C:\WINDOWS;Z:\;
Save this as C:\autoexec.bat and quit Windows, then DOSPad. If you now restart DOSPad, you should be able to run “mem” as well as “win” right from the prompt.
Tutorial: Using The Mouse and Using Drag & Drop in DOSPad-Windows
In order to have your mouse speed similar to real time swiping, we should go to DOSPad’s settings and set “Mouse Speed” to 0. Do the same in Windows – Control Panel – Mouse. Moving the mouse arrow is fairly easy, just tap somewhere and swipe over the screen. Clicking and double clicking is kind of simple to, just tap or double-tap on the screen.
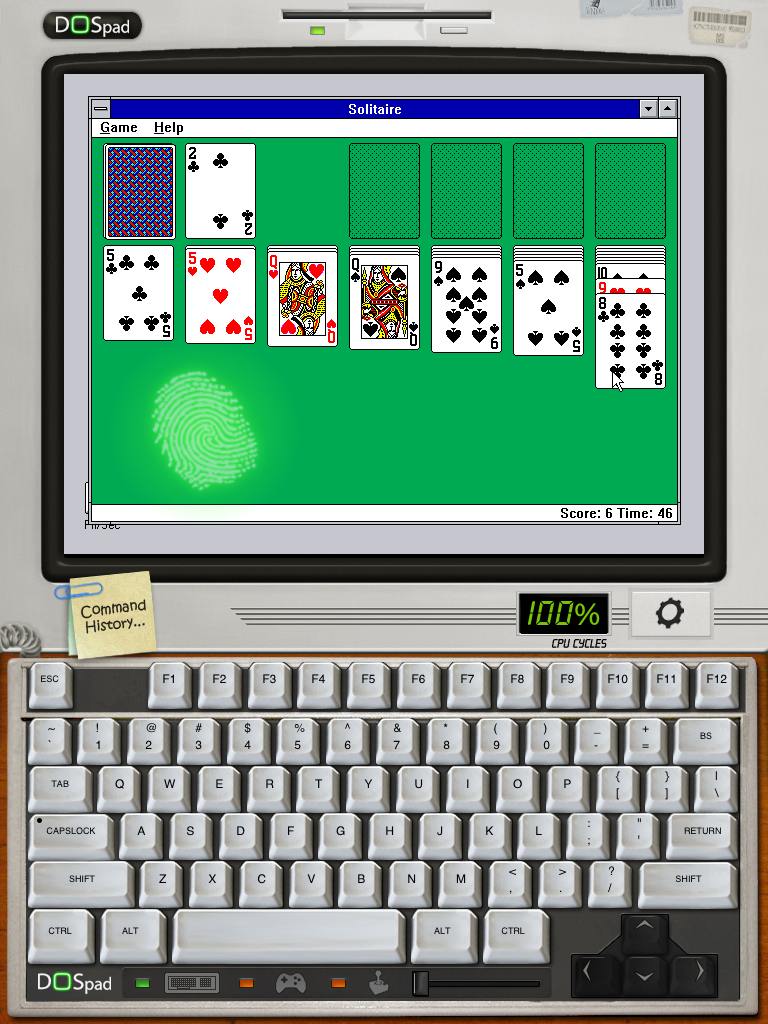
A little more complicated is Drag & Drop which is heavily needed in Solitaire). You need two fingers. Put one on the screen and make sure not to move it. If you’re doing right, a green, glowing fingerprint will appear. The second finger slides over the screen, just like you would do with the mouse pointer dragging your selected item. If you’re done, release both fingers to “drop”.
This needs a little practice, but it is still quite easy compared to the (badly implemented) right-click. This one is supported as well (you need it for example in Paintbrush for the background color). Tap with three fingers simultanously on the screen without moving away.
Conclusion to our “WINPad”
Windows 3.1 on the iPad is not much more than a toy mostly, lacking of useful software nowadays. In addition to that, the emulated 486 CPU is quite slow and prevents running Windows games. But this experiment shows how much power DOSPad has. If you’re a true nerd, you definitely should give this a try, refreshing your old Windows 3.1 and DOS-knowledges. For true DOS-games, DOSPad is a great emulator and gets even better when it supports hardware keyboards or gaming input devices, what already is being announced.
If you want to work seriously with Win3.1 on DOSPad, you should install the y2k-hotfix for the File-Manager from Microsoft.
PS: Windows 3.1 in DOSBox on Windows, Mac and Linux
What the iPad is capable of, desktop computers can do as well. DOSBox is ported to almost any platform and installing Windows 3.1 is done in a very similar way. Except, autoexec.bat is written into dosbox.conf rather than as a true file. But you can use Copy & Paste from your host operating system and you are even able to run higher resolutions (such as 1024×768).
